Setting up a mobile device
Setting up a mobile device
BC Time users have the ability to setup mobile devices that enable them to clock in and clock out employees without the need of an actual physical device being present. This functionality allows the user(s) to manage their employees attendance without requiring the employees themselves to clock on an actual device as long as the user has access to the branch and department to which the employees are linked.
The first step in setting up a mobile device involves the creation of the mobile attendance API as illustrated below:
Creating your Device API
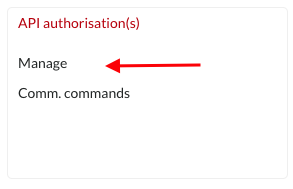
Step 1: Once you've logged into BC Time, navigate to Manage under API authorization(s) to create the Mobile attendance API.
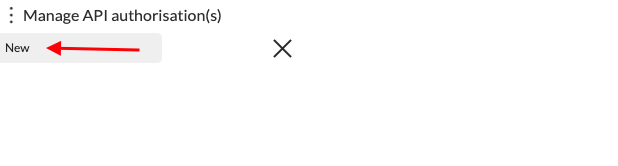
Step 2: Under Manage API authorization(s), select the meatballs (vertical dots) menu to create a New API.
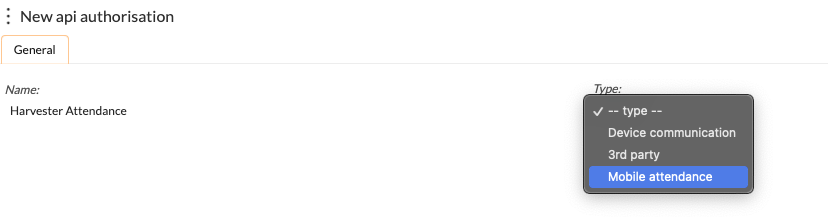
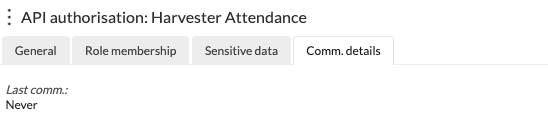
Step 3: The below window will appear — select Mobile attendance asType and give your API a name. Once the name and type has been set, BC Time will auto generate the role membership, sensitive data and communication details for this API.
Creating your Mobile Device(s)
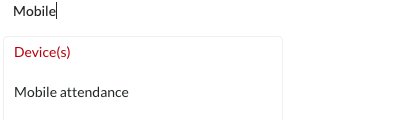
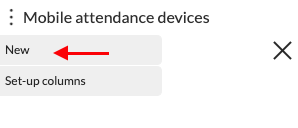
Step 4: Proceed to create your mobile device, by navigating to Mobile attendance under the Device(s) menu.
Step 5: Click the meatballs menu to create a New mobile device.
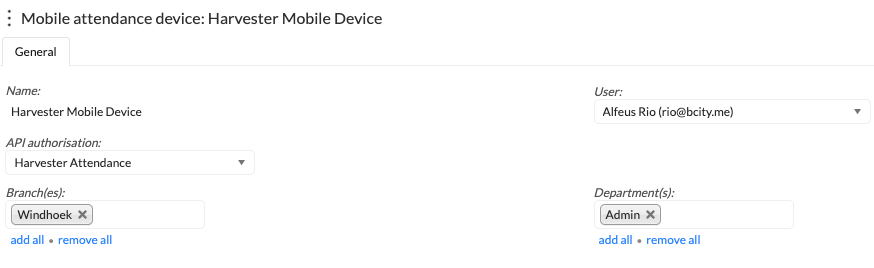
Step 6: The below window will appear allowing the user to name their mobile device, link the user and the API initially created as well as define the branch(es) and Department(s) the user should manage.
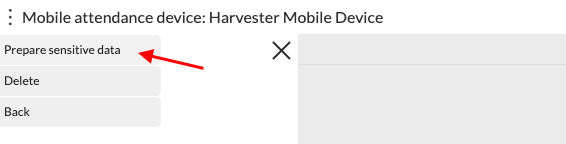
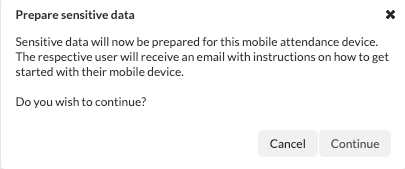
Step 7: Click the meatballs menu to access the "prepare sensitive data" option which will prepare the data for the created device and trigger an email to the specified user.
Once clicked, the below window will appear advising the user that the data is being prepared and an email will be sent to the user with instructions on how to get started. Click continue to proceed with data preparation until success.
Step 8: Access your email to view the link received having successfully continued the data preparation process and click the ''let's get started' link.

Step 9: Having clicked the link, the system will now direct you to a window, to allow authorisation.

Step 10: The system will prompt you to sign in with Binary City Time and you can select if you wish the system to remember your login for 30 days.

Once logged in successfully, you'll be presented with a view of the employees whose attendance the user has access to manage as displayed in the example below. The User will then select either the In or Out option on the employee whose attendance they wish to manage.

Once a state has been selected, BC Time will seamlessly detect the state and report it on the employees attendance reports immediately.

Nenhum comentário até agora.
para ser o primeiro a deixar um comentário.